Monday, May 11, 2015

Noah's Woodland Nursery

It's been so fun sharing with you our home renovation! This room I'm most excited to share with you because well..it's means we get to meet our little guy very soon!!

Originally it was one large bedroom, but we had our contractor turn it into two smaller rooms. Here is the before...


 One is currently being used as a guest room/office and the other is now Noah's nursery! Since we live out in the country and Derrick loves the outdoors, it was only fitting to go with a woodland theme.


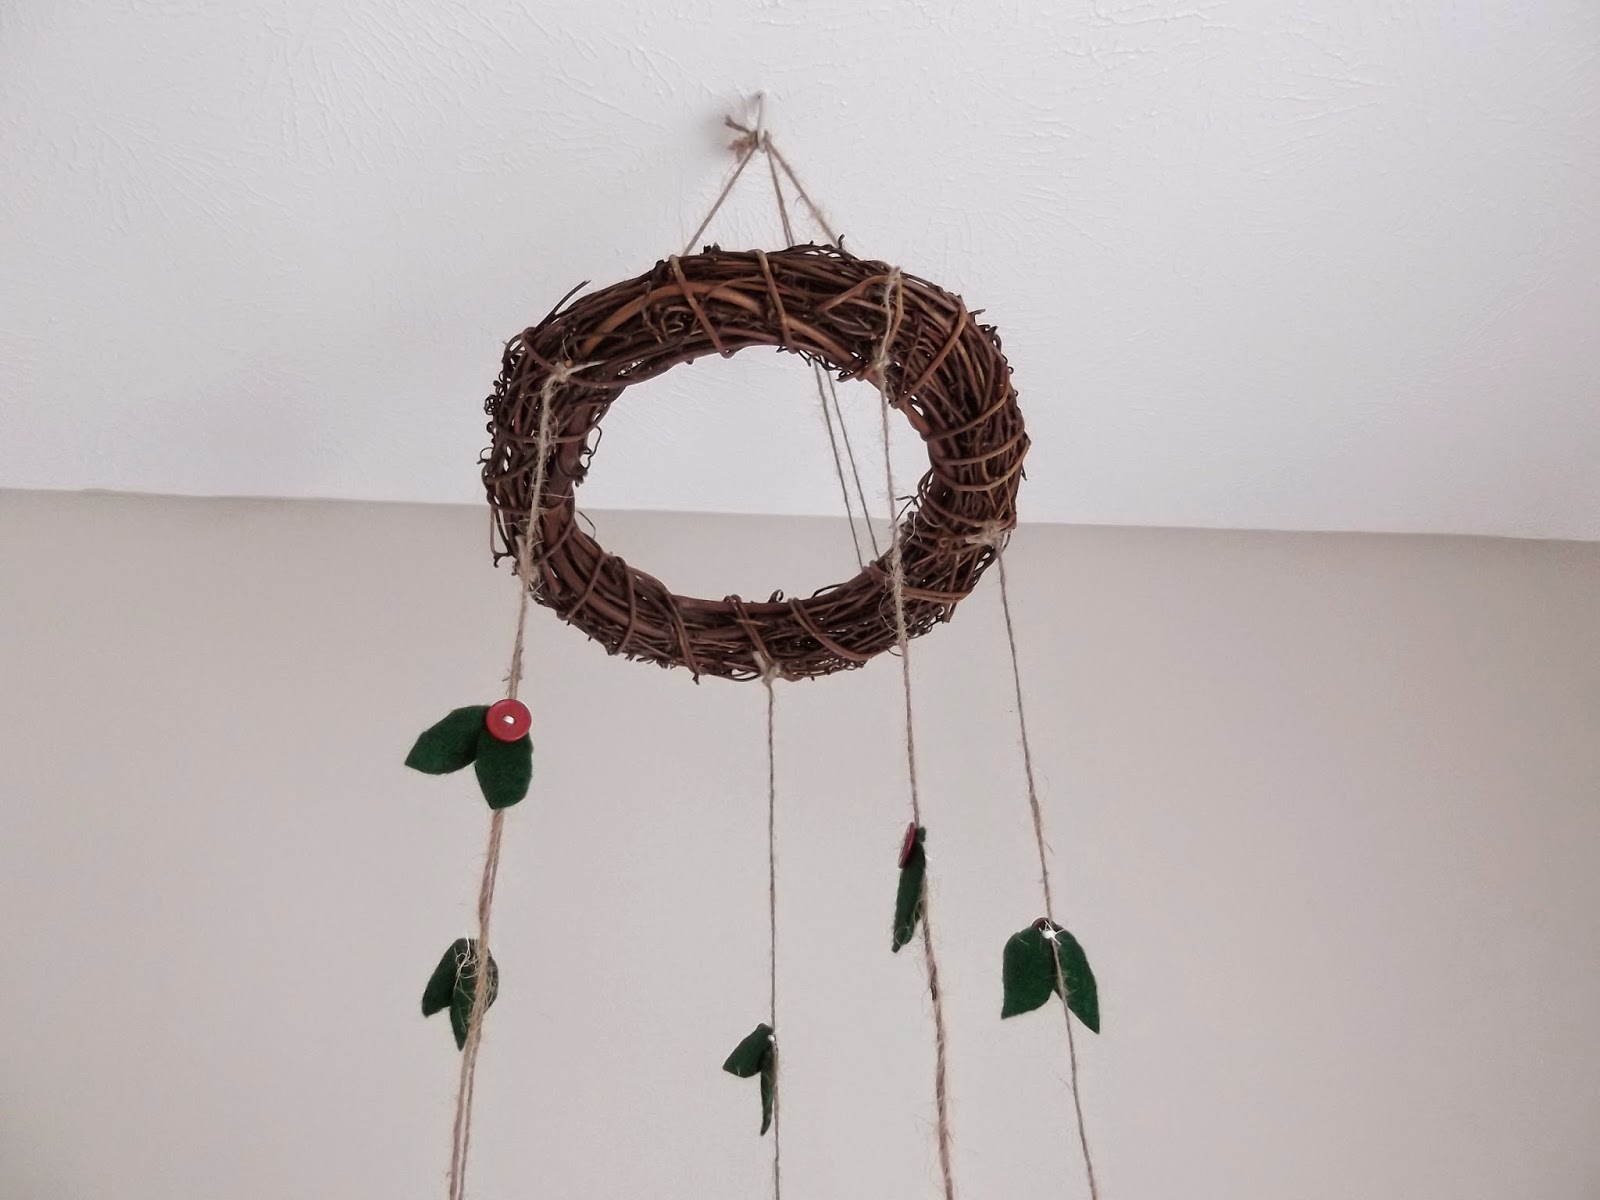
I bought these woodland animal finger puppets on Etsy and sewed them to twine to make a mobile. 


I made the leaves myself with green felt and red buttons.


 This adorable banner was a shower gift from one of my best friends! It turned out so cute and goes perfect in his room!


The old yellow soda crate on the wall was an antique store find and other things collected from Noah's grandmas and around thrift stores are used to set on the shelves.


  I have always loved this bible verse so painted it on a piece of wood we had lying around. Can't beat free wall art!

We received this teddy bear from Derrick's great aunt so I made him a little bandana with some plaid fabric I had in my stash. 


 I love an organized closet! I had seen several pictures on Pinterest of how to make clothes separators. Here is my take on them using different colored foam sheets.


This little area makes me so excited to read and play with Noah! 


It was so fun going around to different antique and thrift stores searching for items to decorate with. My favs are the bright colored ammo boxes and little foxes Derrick's mom bought us!


This red lamp shade was only $2.00 brand new! I love when Target sends Goodwill their clearance items!


Now all we need is for August to hurry up and our little man to get here! :)


Monday, March 23, 2015

Ice Cream Shoppe: Gender Reveal

I can't believe we are already halfway through the pregnancy! I hope the second half goes just as quick so we can meet our sweet baby.....BOY!!! :)


Yesterday we got to reveal to our families the gender and it was a lot of fun! I decided on an ice cream shoppe/what's the scoop theme. Here are the invites I designed for the party.


I used several pieces from my thrifty 31 rentals inventory to decorate with! 


For the actual reveal we filled a cardboard box with balloons. I made "ice cream scoops" out of card stock so each family member could make their guess as to what baby was before we revealed it. Boy was the most guessed! :)


We are so thankful all these people came to celebrate with us!  Noah is loved so much already!!

Monday, March 9, 2015

DIY No Sew Crib Skirt

This past weekend we got our crib and dresser built for the nursery! I knew I wanted some type of crib skirt so I could keep some things hidden underneath the crib for extra storage. 


I had seen some at the store but wasn't crazy how they looked and had heard they get bunched up when you have to lower the mattress as baby gets older. I decided to make my own so I could easily adjust it when needed and keep it the perfect length at the bottom.

I remembered I had some drop cloth leftover from a previous project. I measured and cut a piece for each of the two sides that show in the room.  Make sure the pieces are cut to the full length of each side so they overlap at the corners. (Drop cloth is already hemmed around the edges but if you have material that isn't and you want a finished look, just hem each side before hanging)


 I thought about sewing some ties on the drop cloth to tie around the metal bars on the bed spring, but remembered we had some binder clips and decided to try them out first. I simply clamped the drop cloth to a metal bar...


It worked great!! I'm so happy with how easy this project was and it cost me nothing! Yay!


That cube shelf was my other project this morning. Derrick will be happy when he gets home to see it already put together and not waiting on him! I love working on things for our little one! Can't wait to find out gender in a couple weeks and get some color in the room!! :)

Tuesday, January 6, 2015

DIY Crinkle Toy

As most of you know we announced we are pregnant with our first baby!! Due date is August 6th 2015! 


After two long years of trying to get pregnant we could not be more excited! Although it was very trying at times, we trusted God had a plan and it's so obvious now that His timing really is perfect!

I of course have a list of DIY projects I want to make for this sweet little baby, the first being a crinkle toy.

What you'll need:


1. Two 6"x6" squares (I chose to use two different fabrics)
2. Six 4" ribbons
3.One 6"x6" square of crinkle paper. (I used a plastic bag that some candy came in. You could also you use clear plastic wrapping paper, a bag that wipes come in, etc)
4. Sewing Machine  
5. Scissors
6. Straight Pins

What to do:

1. First, lay out your first fabric square FACE UP. Fold each ribbon in half to make a loop and pin it to the fabric square, making sure the loop faces inward.


2. Lay your second fabric on top FACE DOWN.


3. Lay your crinkle paper on top of the second fabric square and pin all three layers together. 


4. Sew with about a 1/2" seam allowance, making sure to leave an opening so you can turn it right side out.

5. After you've finished sewing, remove pins and trim any excess thread, fabric or ribbon.

6. Turn right side out and a top stitch all the way around, making sure you sew closed the opening you had originally left.


7. Enjoy playing with your baby, practicing their grasp and noticing the different colors, textures, etc!

Monday, December 8, 2014

5 minute Christmas Card Holder

Ok, this was SO easy. It actually took less that 5 minutes probably. The longest part was waiting for the hot glue gun to heat up.

You'll need:

Wide burlap ribbon/ strip of fabric (whatever length you want)
Two small pieces of the same ribbon or fabric (for making the bow)
Small piece of twine or ribbon for hanging
Glue gun


Directions:

Make a bow by scrunching the middle of a small piece of the burlap ribbon. Use another small piece to wrap around the piece you just scrunched. Place a dab of hot glue on the back to keep in place.


Use another few dabs of hot glue to secure the bow to the top of the long piece you have cut. Then attach some twine or ribbon to the top for hanging.

Finally, clip on your Christmas cards as they come in the mail! Super easy, right? :)