Monday, September 29, 2014

Easy Funfetti Cookies

I love trying out new cookie recipes! I found this one written down in my recipe box, but don't know where the original came from.  These probably aren't the healthiest, but they are yummy and not very hard to make! 


Ingredients:
2 sticks butter, softened
1 1/4 cup sugar
2tsp. vanilla
1 egg
2 1/2 cup whole wheat flour
1/4 cup cornstarch
3/4 tsp. baking soda
1/2 tsp.salt
1/2 cup sprinkles

 Directions:
1. Preheat oven to 375 degrees Fahrenheit
2. Cream butter and sugar
3. Add vanilla and egg 
4. Mix in flour, cornstarch, baking soda and salt
5. Mix in sprinkles (don't over mix)
6. Ice cream scoop dough onto cookie sheets 1 1/2" apart
7. Bake 12-15 minutes until golden 

*Makes about 20 cookies*

Friday, September 26, 2014

Guest Bathroom Reveal!

Awhile back I shared with you the tutorial for the drop cloth shower curtain I made for our guest bathroom. 


Here is what the rest of the room looks like too.
Originally there was only one bathroom in the house (now our master bathroom). Since we moved the kitchen to part of the dining room, we made the old kitchen into a guest bath.

Here is a picture of the room before when it was the kitchen. 


And now, our guest bathroom! Still amazes me when I see the before and after photos how great of a job our contractor and his team did!!


My sister got me this mint colored picture frame and it was the inspiration for the color in the room. I took a picture of our pond to put in it!


Thanks for coming to check out another finished room in our home! I hope you all have a great weekend!

Monday, September 22, 2014

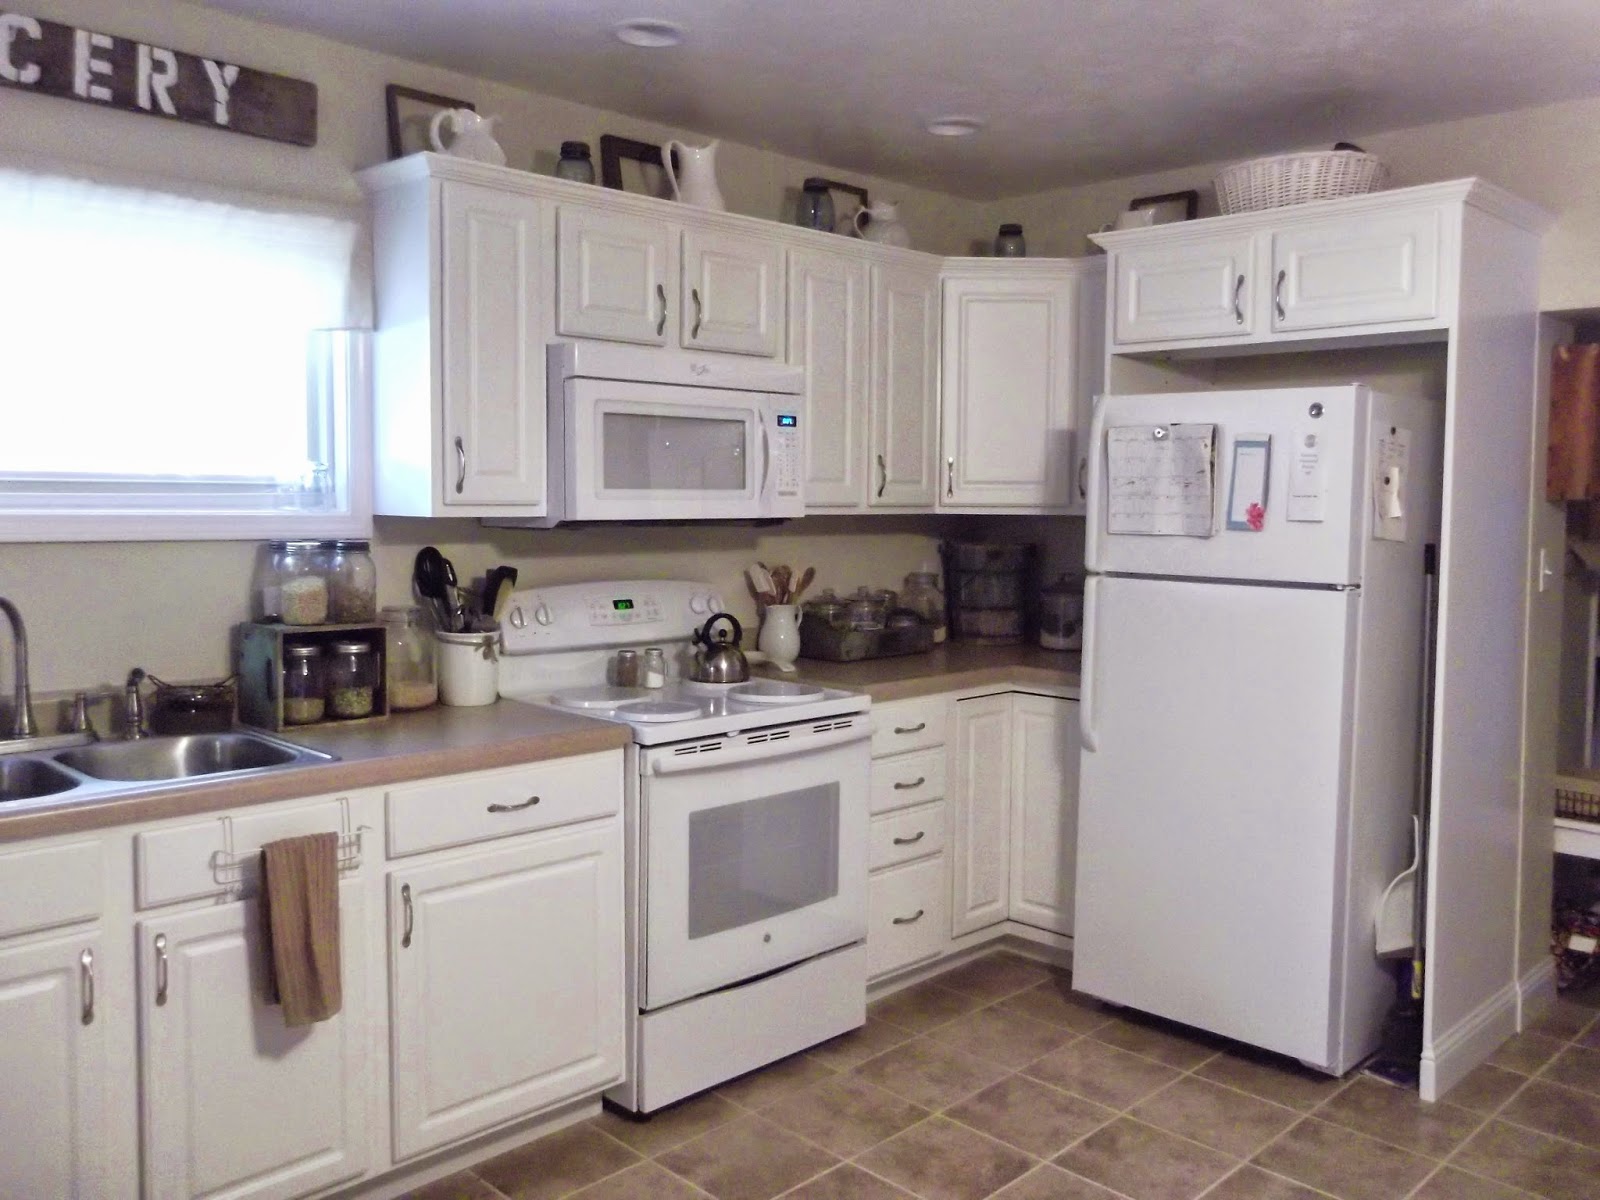
Kitchen Reveal!

This is probably one of the biggest transformations! Originally the kitchen was in the very back of the house and had these steel blue cabinets straight from the 60s.


 I wanted to have a more open floor plan so we moved the kitchen into half of the dining room so it would be open to the living room as well. Here is what it looked like before....


And now!


We ended up covering up the two smaller windows in the room to allow for more cabinet space, but I still love the large window we kept over the sink that looks out into the backyard.


I found an over the cabinet towel bar that works great for those faux drawers by the kitchen sink. I can't remember where I got this one, but have seen them at T.J. Maxx since.


I love aquas and greens so am always looking for vintage pieces with these colors. I found this old toolbox tray that I use for holding dry baking ingredients such as sugars, baking powder, etc at a local antique store. The ice cream maker was a find at the Covered Bridge Festival we went to last year in Indiana. (It's coming up again in October if you want to check it out!)


The wood crate was a Ross find, but still has the same vintage look and colors to it. Holds dry goods such as beans, pasta and corn kernels next to the stove.


I collect vintage white pitchers and aqua mason jars. I love having a place to display them above our cabinets.


We found these bar stools on facebook and just recovered them. Love having a snack bar and so much more counter space now!

Our DIY mason jar pendent lights! We found the white pendent lights at Home Depot and here is the tutorial we used to make them.


Here are the dining room and kitchen together.


Tuesday, September 16, 2014

Dining Room Reveal!

Somehow despite the tons of before pictures I took of our house when we first bought it, I failed to get one of the dining room. Just imagine old carpet and wood paneling...Ok, now here are some after pictures! 

The two french doors on either side of the buffet were part of the house when we purchased it. During the renovation, I made sure to save them. I think they're a great addition to the room and I love the thought of keeping them with the house.  


The antique buffet originally belonged to my hubby's great grandparents. It got a makeover too and is perfect for holding all of my serving dishes!


I started decorating for fall today! Love this little pumpkin and fall flowers I picked up at Dollar Tree.


We bought this vintage Hoosier cabinet at a local antique store and are using it to hold all of our hot beverage necessities.


This adorable apron belonged to my grandma. She always enjoyed cooking and baking for us when we came over. Love getting to think of her each time I use it!


Our favorite part of the house is the fireplace. It is actually two fireplaces! One side looks into the living room and the other side here, looks into the dining room. I'm so excited for cooler weather getting here so we can start using it soon!  


Hope you enjoyed the first completed room on our home tour! Stay tuned for the next one!

Monday, September 8, 2014

DIY Drop Cloth Shower Curtain

With a new house comes new opportunists for DIY projects! One of the first projects I tackled was this drop cloth shower curtain. I love the linen look of this shower curtain below from Pottery Barn, but for $99.00? No thanks!


I had seen several drop cloth window curtains on Pinterest (and am using some in my living room..post to come soon!), so knew it would work for a shower curtain too! Drop cloth is durable and it has a similar natural look to the one from Pottery Barn, but for way cheaper!

Supplies Needed:
6ft x 9ft drop cloth  (Lowe's)
2 Grommet Kits (Hobby Lobby)
Extra long shower curtain (Bed Bath & Beyond)
Scissors
Hammer


The longest liner I could find was only 7ft long, so I folded over 2ft of the drop cloth to make it 7ft, the same length as the shower curtain. I pinned it in place so it wouldn't move when installing the grommets. You could also just cut off two feet and hem it, but I didn't want to put that much work into it lol


After I made the drop cloth 7ft long, I lined it up with the liner and pinned them together. I then made my grommet holes in the same spot as the liner holes.


Follow the directions on the grommet kit. I got extra large grommets and they were a little too big so had to hammer pretty hard to get them secure. Also, the grommets I got at Hobby Lobby came in a pack of 10, and you will need 11 of them. So be sure to buy two packs.


Once they are on, unpin the drop cloth from the shower curtain. The drop cloth actually ended up only being 5'5" wide, so I had to trim the shower liner a 1/2" to make them even.

Put your curtain hooks through the grommets and enjoy your new shower curtain!


More pics of the finished guest bathroom to come! Hope you all have a great Monday!